
Home » How to Lay Ground Protection Mats Safely
How to Lay Ground Protection Mats Safely
- Author: Balance Lee
- 9+ Years of Manufacturing
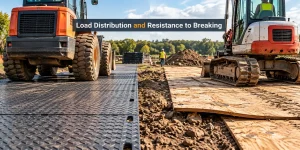
Installing ground protection mats is not only about placing panels on the ground and connecting the edges. A safe temporary access route depends on several factors, including ground conditions, vehicle loads, mat selection, installation direction, and routine inspection.
If you are preparing a route for construction vehicles, cranes, landscaping equipment, or heavy machinery, the installation method directly affects traction, stability, and the service life of the mats. A well-planned system can help reduce ground damage, prevent vehicles from getting stuck, and create a safer working environment.
In this guide, you will learn how to lay ground protection mats safely — from assessing the site and choosing the right mat system to connecting panels, securing difficult areas, and maintaining the installed route. The following steps are based on practical considerations from real ground protection projects and manufacturing experience, helping you avoid common installation issues before they happen.
Table of Contents
Assess the Ground, Route, Loads, and Hazards
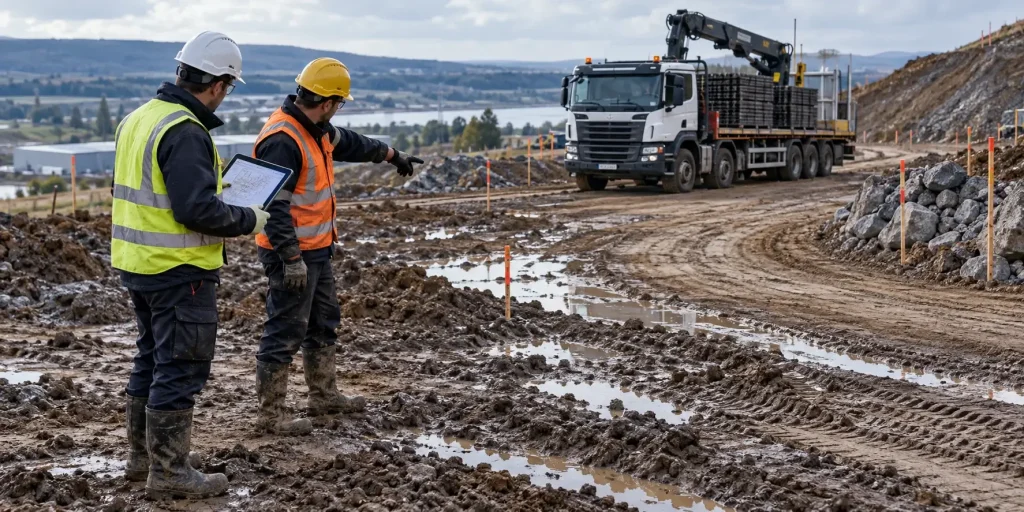
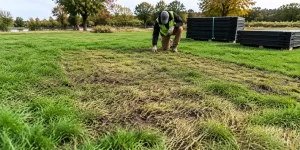
Before selecting a ground protection mat or planning the installation layout, you need to understand the conditions the mats will face. A mat system that performs well on firm grass may require a different approach when installed on soft soil, mud, slopes, or areas with repeated heavy vehicle traffic.
The first step is to evaluate four key factors: ground condition, travel route, equipment load, and potential hazards.
1. Check the Ground Condition Before Installation
The supporting ground underneath the mats has a major influence on stability. Ground protection mats distribute vehicle loads over a wider area, but they do not replace proper ground assessment.
Before installation, check:
- Soil firmness: Soft soil, saturated ground, or recently excavated areas may require thicker mats or additional preparation.
- Surface condition: Grass, gravel, asphalt, concrete, and muddy terrain create different traction and support conditions.
- Drainage: Areas with standing water or poor drainage may need attention before placing mats to reduce movement during traffic.
For example, a temporary access route across a lawn may only need basic preparation when the soil is firm and traffic is limited. However, the same mat thickness may not perform the same way on wet ground where vehicle wheels create concentrated pressure points.
In practical installations, many performance issues are related to the supporting ground beneath the mats rather than the mat material itself. Even when a mat has sufficient structural strength, unstable soil conditions can still contribute to movement, uneven joints, or rutting between panels.
2. Plan the Route According to Traffic Conditions
The route layout should be determined before placing the first panel. A straight access path and a route with frequent turns create different loading conditions.
Consider:
- Where vehicles enter and exit
- Turning areas for trucks or equipment
- Locations where vehicles may stop or change direction
- Areas exposed to repeated traffic
Turning zones deserve special attention because tires generate additional lateral forces when changing direction. In these areas, keeping connections properly engaged and providing enough coverage around the turning radius can help maintain route stability.
3. Evaluate Vehicle Loads and Traffic Frequency
Vehicle weight is only one part of the load calculation. The actual pressure applied to the mat depends on:
- Total equipment weight
- Axle configuration
- Tire size and contact area
- Number of passes per day
- Ground support underneath the mats
For example, a loaded truck passing a route several times per day creates a different requirement from occasional pedestrian access or light equipment movement.
For construction access routes, 15 mm HDPE ground protection mats are often considered when repeated vehicle traffic or softer ground conditions are expected, while lighter applications may allow thinner panels depending on the site conditions.
The correct choice should be based on the complete working environment rather than thickness alone.
4. Identify Potential Hazards Before Laying Mats
A site inspection should also identify areas that may affect safety:
- Slopes where mats could slide
- Uneven surfaces that may create gaps between panels
- Sharp rocks or debris that may damage the underside
- Drainage channels or soft edges
- Areas requiring frequent vehicle braking or turning
Marking these locations before installation helps the team prepare suitable solutions, such as additional ground preparation, different connection methods, or layout adjustments.
Practical Site Check Before Installation
Before the first mat is placed, confirm:
✓ The route can support the expected traffic
✓ Soft or unstable areas have been identified
✓ Vehicle entry, exit, and turning points are planned
✓ The required mat thickness and connection system match the site conditions
✓ Potential hazards have been marked
Once the ground conditions, route design, and loading requirements are clear, the next step is choosing the right ground protection mat type and connector system for the project.
Choose the Correct Mat Type and Connector Syste
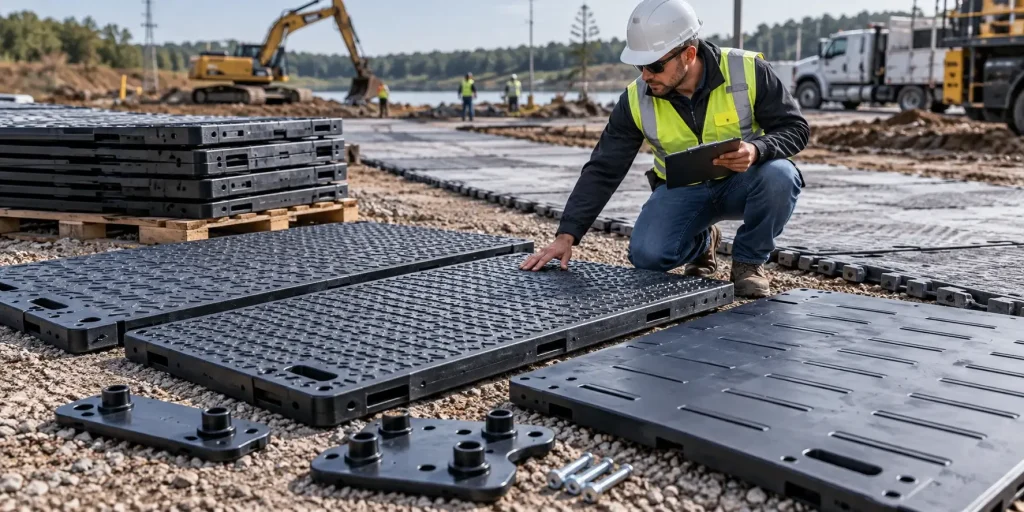
After evaluating the ground conditions, traffic route, and expected loads, the next step is selecting a ground protection mat system that matches the actual working environment.
Choosing a mat only by thickness or load rating can lead to an unsuitable solution. The right choice depends on several factors, including ground condition, vehicle type, traffic frequency, surface requirements, and how the mats will be connected together.
1. Select the Mat Thickness Based on the Working Conditions
Ground protection mats are available in different thicknesses because different sites create different loading challenges. A thicker mat is not automatically the best option; it should match the combination of vehicle loads and ground conditions.
Before choosing mat thickness, evaluate:
• Maximum wheel or track load
• Ground condition
• Traffic frequency
• Turning and braking requirements
• Connection system
A practical reference:
| Application Condition | Reference Guidance |
|---|---|
| Pedestrian access, landscaping, and light equipment movement | 10–12.7 mm mats may be suitable when the ground provides adequate support and loading conditions remain limited. |
| Construction access routes with repeated vehicle movement | 12.7–15 mm mats may be considered when vehicle loading, ground conditions, and route layout require increased load distribution. |
| Soft ground, heavy equipment, frequent traffic, or demanding site conditions | 15 mm or thicker mats may provide additional support when the project requires higher load distribution capability. |
The actual requirement depends on more than equipment weight. Vehicle contact area, ground bearing condition, traffic pattern, and movement type can all influence mat performance. A compact excavator, loaded truck, and crane support vehicle may have very different pressure patterns because their contact areas and movement methods are different.
For example, a loaded truck traveling repeatedly along the same route can create concentrated stress at wheel contact points. In this situation, a thicker HDPE mat with a stable connection system may perform better than a thinner panel installed without considering traffic conditions.
2. Choose the Right Surface Pattern for Traction and Protection
The top and bottom surface design of a ground protection mat affects how it performs on site.
The main surface options include:
Smooth Surface Mats
Suitable when:
• Equipment movement and cleaning requirements are important
• The application requires easier material handling or repositioning
• The site conditions allow sufficient traction with a smoother surface design
A smoother surface can make repositioning easier and may reduce dirt accumulation in certain applications. However, surface selection should also consider vehicle movement, weather exposure, and traction requirements.
Textured or Anti-Slip Surface Mats
Suitable when:
• The route may experience wet, muddy, or changing surface conditions
• Pedestrian slip resistance is an important consideration
• Vehicles require additional surface grip based on site conditions
For wet grass, muddy construction areas, or temporary access roads exposed to changing weather, textured surfaces can help improve grip under suitable conditions.
For wet grass, muddy construction areas, or temporary access roads exposed to changing weather, textured surfaces can help improve grip.
In practical applications, the surface pattern should be selected according to the main site requirements, such as vehicle traction, pedestrian safety, cleaning needs, and expected ground conditions.
3. Select the Connection System According to Route Layout
The connection method is another important part of a ground protection system. Mats installed as individual panels without proper connection may shift when vehicles brake, turn, or repeatedly pass over the same area.
The correct connector system depends on the route design.
| Route Condition | Connection Consideration |
|---|---|
| Straight access route | Standard edge-to-edge connection may be sufficient |
| Vehicle turning areas | Stronger connection and additional coverage may be needed |
| Slopes or uneven terrain | More attention should be given to preventing panel movement |
| Long temporary roads | Secure connections help maintain alignment |
For large projects, such as construction sites or temporary roads extending hundreds of meters, maintaining panel alignment becomes more important because small movements can accumulate over time.
4. Consider Handling and Installation Requirements
The best mat system is not only determined by performance. Installation efficiency also affects project cost.
Before choosing the final specification, consider:
- Can the available workers handle the panel weight?
- Is machinery available for installation?
- Will the mats need frequent repositioning?
- How quickly does the route need to be opened?
For example, a 4 ft × 8 ft (1220 × 2440 mm) HDPE ground protection mat is widely used because it provides a practical balance between coverage area, handling efficiency, and transportation cost.
For projects requiring frequent relocation, a lighter system may improve installation speed. For long-term temporary access routes, durability and connection stability may become higher priorities.
Practical Selection Checklist
Before ordering or installing ground protection mats, confirm:
✓ The mat thickness matches the expected traffic and ground condition
✓ The surface pattern provides suitable traction for the environment
✓ The connector system fits the route design
✓ The panel size can be handled efficiently on site
✓ The complete system is suitable for repeated use
Selecting the right mat system before installation helps prevent problems later, but even the correct mats require proper site preparation. The next step is preparing and marking the installation area before placing the first panel.
Prepare and Mark the Installation Area
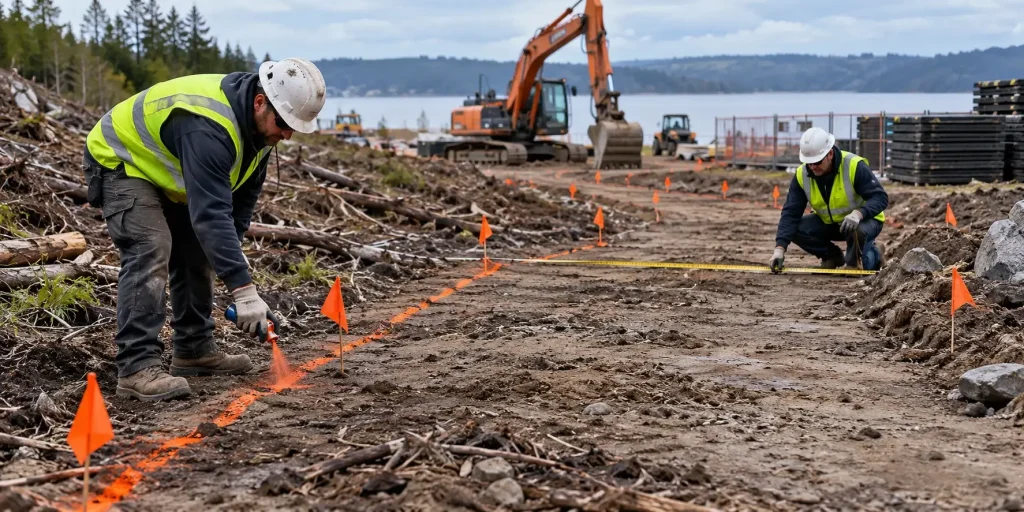
Once the mat type and layout plan have been confirmed, the next step is preparing the installation area. Proper preparation helps the mats sit firmly on the ground, reduces unnecessary movement during traffic, and makes the installation process more efficient.
Before placing the first panel, the site should be cleared, inspected, and marked according to the planned route.
1. Clear the Installation Surface
The first preparation step is removing materials that may affect the contact between the mats and the ground.
Check the installation area for:
- Large stones, branches, metal debris, or other sharp objects
- Excessive mud buildup or loose materials
- Uneven areas that may prevent panels from sitting flat
- Obstacles around vehicle access points
Small surface issues can become larger problems after repeated traffic. A sharp object under the mat may create localized pressure, while uneven ground can cause gaps between connected panels.
For temporary access routes installed on grass or soil, a relatively flat surface helps the mats distribute loads more evenly and maintain better connection performance.
2. Confirm the Route Width and Alignment
Before installation begins, mark the planned route on the ground.
This helps the team confirm:
- The required travel width for vehicles
- The starting and ending points of the route
- Areas requiring additional coverage
- Turning zones and equipment operating areas
For example, a 1220 mm wide mat provides a fixed coverage width, but actual vehicle clearance requirements may require a wider route depending on the equipment size and whether vehicles need passing space.
Planning the route before laying mats can reduce unnecessary repositioning and material waste.
3. Identify Special Areas Before Installation
Not every section of a temporary route has the same requirements. Marking higher-risk areas in advance allows the installation team to prepare suitable solutions.
Pay extra attention to:
Vehicle Entry and Exit Points
These areas are subject to concentrated wheel loads during vehicle acceleration, braking, or turning.
Turning Areas
Turning movements create additional sideways forces on the mats. These sections may require more careful alignment and stronger connections.
Slopes and Uneven Ground
Sloped areas require attention because gravity and vehicle movement can increase the risk of panel shifting.
Soft or Wet Sections
Low-bearing areas may need additional preparation before placing mats to avoid excessive movement after traffic begins.
4. Prepare the Installation Team and Equipment
A smooth installation also depends on having the right tools and working method ready.
Before starting, confirm:
- The correct number of mats and connectors are available
- Workers understand the planned installation direction
- Handling equipment is prepared if panels are heavy or the project is large
- Safety requirements for the site are followed
For larger projects, such as temporary roads extending hundreds of meters, organizing the installation sequence before work begins can significantly improve efficiency.
Site Preparation Checklist
Before laying the first mat, confirm:
✓ The surface has been cleared of damaging debris
✓ The route has been measured and marked
✓ Entry points, turns, and high-load areas have been identified
✓ Mats and connectors are ready for installation
✓ The installation direction has been confirmed
After the area is properly prepared and marked, the first mat can be positioned. The starting point and travel direction will influence the stability and alignment of the entire route.
Position the First Mat and Set the Travel Direction
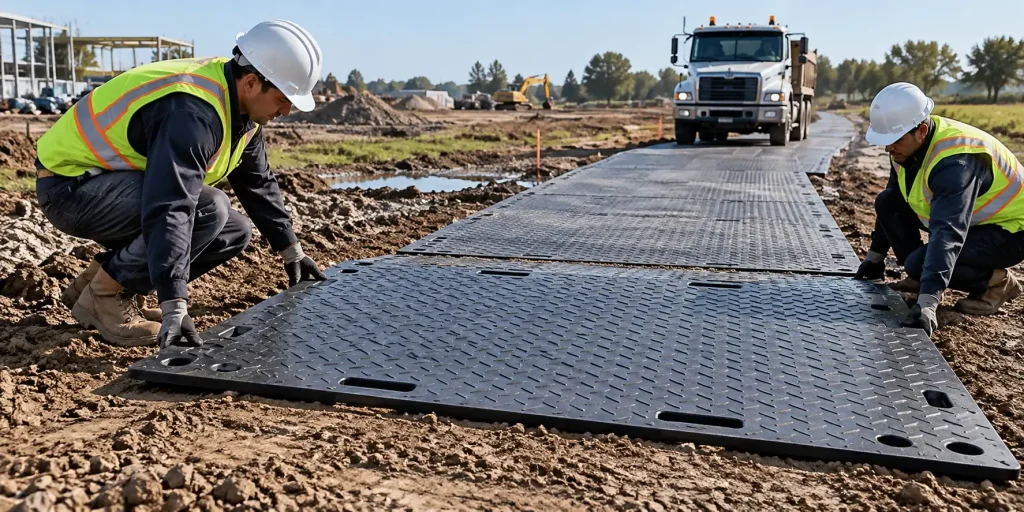
With the installation area cleared and marked, begin at the planned access point. The position of the first mat establishes the alignment for the remaining panels, so even a small error at the starting point can lead to uneven joints or unnecessary adjustments further along the route.
1. Position the First Mat on Stable Ground
Place the first panel at the designated starting point, with its intended traffic surface facing upward. For double-sided textured mats, confirm which surface orientation is specified for the project.
Before moving to the next panel:
Check ground contact: The mat should sit steadily without rocking or leaving unsupported sections beneath its edges.
Align with the route markings: Keep the panel edges consistent with the planned travel path.
Check the entry transition: Avoid creating an abrupt raised edge where vehicle tires first approach the mat.
If the starting area is soft or uneven, correct the underlying support before continuing. Adding more panels will not resolve instability beneath the first one.
2. Set the Mat Orientation According to Vehicle Movement
A 1220 × 2440 mm (4 × 8 ft) ground protection mat can be positioned with either its long or short side following the travel direction, provided the arrangement is compatible with the mat design and site requirements.
The decision should account for vehicle track width, required road coverage, wheel paths, and connector locations.
For example, on a temporary road approximately 3.9 m wide, three 1300 mm-wide panels can be arranged side by side to provide a nominal coverage width of 3900 mm.
The usable width may be smaller depending on the joint design and edge clearance.
For this type of layout, check that both wheel paths remain adequately supported during straight travel and turning. Avoid placing a longitudinal joint directly beneath a heavily loaded wheel path where the resulting joint movement or loss of support could create a hazard.
3. Confirm Alignment Before Extending the Route
Once the first mat is positioned, check its alignment against the marked route before placing additional panels.
Focus on three points:
Straightness: The panel follows the intended route rather than gradually shifting sideways.
Edge positioning: The outer edge leaves sufficient clearance from ditches, unstable shoulders, or other hazards.
Connection alignment: The connector holes or attachment points are positioned to match the next panel without forcing the connection.
Do not use moving vehicles to push misaligned mats into position. Adjust the panels with suitable handling equipment while the installation area is closed to traffic.
A Practical Installation Detail
For a temporary road project involving 1300 × 2000 mm HDPE mats, arranging three panels across the route provides approximately 3.9 m of nominal width. At this scale, aligning the first row carefully helps prevent cumulative offsets along the road.
The key is not simply making the first mat look straight. Its position must support the planned wheel paths and allow subsequent panels to connect without creating unstable joints.
With the starting position and travel direction established, the remaining mats can be laid in sequence and connected to form a continuous access route.
Lay, Overlap, or Connect the Remaining Mats
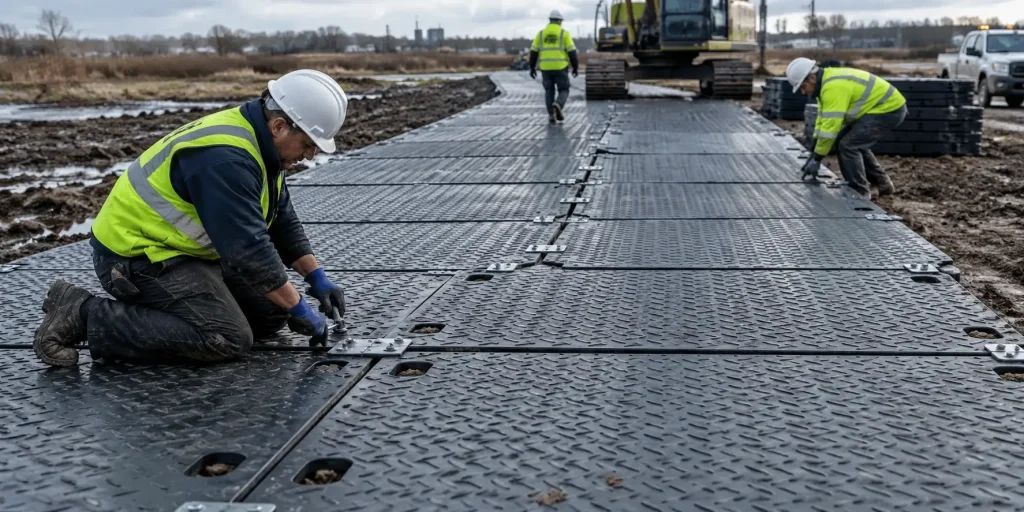
With the first mat aligned, extend the route by positioning the remaining panels according to the planned layout. Keep each panel properly supported and aligned before securing the joints. Incorrectly positioned connections can create raised edges, uneven transitions, or gaps that become more noticeable under repeated vehicle traffic.
The installation method depends on the mat design. Some systems use edge-to-edge connectors, while others incorporate interlocking or engineered overlapping features.
1. Lay the Remaining Mats in Sequence
Place the next panel alongside or ahead of the first mat, following the established route direction. Work progressively along the access road rather than scattering individual panels across the site.
During installation:
Maintain alignment: Keep adjacent panels consistent with the marked route and intended wheel paths.
Check edge contact: Position the edges according to the manufacturer’s joint design, without forcing panels together.
Avoid unsupported joints: Ensure the ground beneath adjoining edges provides adequate support, particularly where vehicle wheels will cross.
For a multi-panel temporary road, complete and align each row before extending the next section. This makes it easier to identify positioning errors before they affect a longer stretch of the route.
2. Connect Adjacent Mats Using the Designed Attachment Points
For HDPE ground protection mats with pre-drilled connection holes, use compatible connectors to secure adjoining panels.
Before installation, confirm the selected mat model, connector type, hole arrangement, and manufacturer’s installation instructions. Different mat systems may use different connection designs and installation methods.
Follow these steps:
1. Align the connection holes of neighboring mats without lifting or twisting the panel edges.
2. Insert the specified connectors through the designated attachment points according to the connector design.
3. Secure the connectors using the manufacturer’s installation method, avoiding excessive tightening that could deform the HDPE around the holes.
4. Check the completed joint for proper engagement, protruding hardware, and unintended gaps or height differences.
Two-hole connectors can join compatible adjoining panel edges, while four-hole connectors may be used at suitable four-panel intersections. Connector selection should match the mat’s hole layout, connection design, and expected site conditions.
Do not replace specified connectors with improvised wire, rope, or unsuitable fasteners, especially on routes carrying construction vehicles.
3. Overlap Mats Only When the System Is Designed for It
Not every ground protection mat is suitable for overlapping installation.
For flat HDPE panels with edge connection holes, overlapping one panel over another can create a raised step and concentrate wheel loads along the unsupported edge. This can increase the risk of panel movement or damage.
If the selected system includes engineered overlapping edges or interlocking features, follow its specified overlap direction and engagement requirements.
For standard butt-connected HDPE mats, keep the designed joint arrangement instead of creating an improvised overlap.
4. Check Each Section Before Continuing
After completing a group of connected panels, inspect the joints before extending the route.
Check that:
Adjacent mats remain properly aligned and supported.
Connectors are fully engaged and do not protrude into the travel surface.
No panel edge has lifted or formed a hazardous step.
The next row can be installed without forcing the connection points.
For long temporary access roads, correcting a misaligned section immediately is more practical than discovering the problem after dozens of additional panels have been connected.
Practical Installation Detail
For a temporary road using 1300 × 2000 mm HDPE mats arranged three panels across, the installation team can assemble and align one transverse row before progressing to the next.
The connector arrangement should match the actual panel layout. Two-hole connectors may secure adjoining edges, while compatible four-hole connectors can be considered where four panel corners meet.
At these intersections, the objective is to maintain panel alignment while allowing the joint to perform as designed under traffic loads, rather than forcing every panel into rigid contact.
Once the continuous route has been laid and connected, attention can shift to locations where additional movement or uneven support may occur, including edges, turning areas, slopes, and ground transitions.
Secure Edges, Turns, Slopes, and Uneven Sections
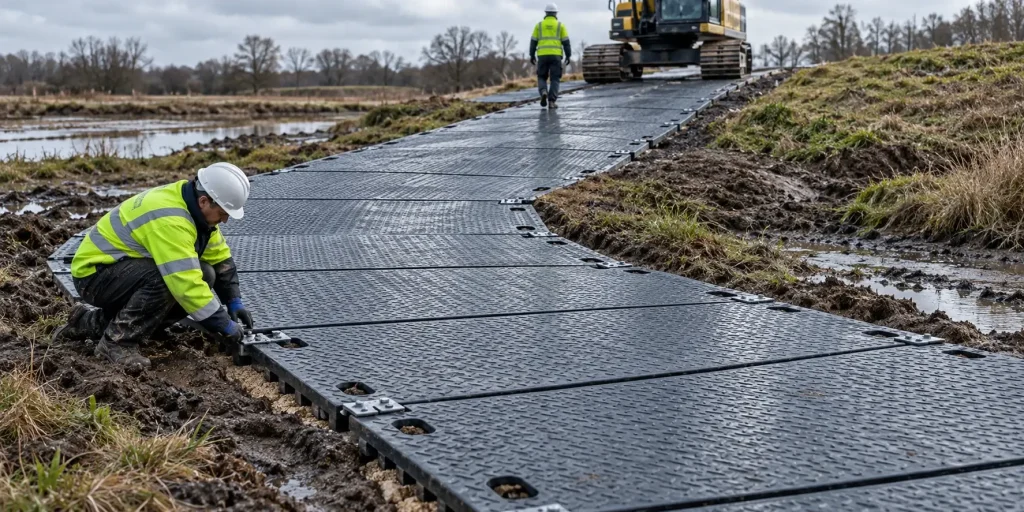
After connecting the main sections of the temporary access route, inspect the areas where mats are more likely to shift, lift, or lose ground support. Road edges, turning points, slopes, and uneven surfaces require different securing methods because the forces acting on the panels vary with vehicle movement and ground conditions.
A connector that keeps two mats aligned on level ground may not prevent the entire connected section from sliding on a slope or shifting sideways during a sharp turn. These locations need additional attention before the route is opened to traffic.
1. Protect Exposed Edges and Entry Transitions
The outer edges of a mat route can become unstable if vehicles travel too close to unsupported ground or enter the panels at an abrupt height difference.
To reduce these risks:
Maintain edge clearance: Position the route so vehicle wheels remain within the supported area, allowing for steering movements and vehicle width.
Support exposed edges: Correct soft shoulders or voids beneath the panels rather than leaving edges suspended.
Create smooth transitions: Use compatible transition ramps or approved ground preparation where vehicles enter and leave raised mats.
For example, a 15 mm mat creates a nominal 15 mm height difference above an adjacent level surface before accounting for surface texture or ground settlement. Although this appears small, an exposed edge can still catch small wheels or create a trip hazard for pedestrians.
Avoid placing stakes or improvised restraints through the mat unless the manufacturer has approved those fixing points and the site has been checked for buried utilities.
2. Reinforce Turning and Braking Areas
Vehicles exert sideways forces on the mats when steering, particularly where loaded tires change direction under low-speed, high-torque conditions.
At turning points, the priority is maintaining wheel support and preventing lateral displacement, not simply adding more connectors.
Check whether the layout provides sufficient coverage for the complete swept path of the vehicle, including its rear wheels. If the turning radius extends beyond the protected surface, additional panels may be required.
For routes used by loaded trucks or construction equipment, consider:
Extending mat coverage around the outer turning path.
Using compatible reinforced connections where required by the system design.
Restricting sharp stationary steering that places high shear forces on individual panels.
Inspecting joint movement after initial vehicle passes.
A recurring issue in temporary-road planning is calculating road width from the vehicle body alone. Rear-wheel tracking and turning clearance also determine how much mat coverage is needed.
3. Control Mat Movement on Slopes
Sloped ground introduces forces that differ from those on level routes. During uphill acceleration or downhill braking, vehicle traction forces can act along the surface of the mats, increasing the possibility of displacement.
Before using mats on an incline:
Confirm slope suitability: Check the manufacturer’s installation limitations and whether the underlying soil provides adequate resistance to sliding.
Evaluate restraint requirements: Use an approved anchoring or restraint system if the mat design and site conditions require one.
Manage vehicle movement: Establish appropriate travel direction, speed restrictions, and braking procedures based on the site risk assessment.
A textured upper surface can improve tire traction under suitable conditions, but it does not guarantee that the underside of the mat will remain stationary on wet soil or grass.
Do not rely on edge connectors alone to secure an entire mat route on a slope. If the route cannot be adequately supported and restrained, an alternative access method or engineered ground improvement may be necessary.
4. Stabilize Uneven and Soft-Ground Sections
When mats bridge depressions, deep ruts, or unsupported joints, vehicle loads may cause excessive panel bending and movement.
For shallow, localized surface irregularities, appropriate levelling and compaction may improve support. Deeper ruts, saturated ground, and significant elevation changes require further assessment before installation.
Pay particular attention to:
Unsupported joints: Adjacent mat edges should not span a depression without an approved support arrangement.
Abrupt level changes: Use suitable transitions rather than forcing panels to bend over sharp changes in ground elevation.
Soft ground beneath wheel paths: Address inadequate bearing support instead of assuming a thicker mat will solve the problem.
For a long temporary access road assembled from multiple HDPE panels, a single poorly supported section can affect nearby connections as loaded vehicles pass over it.
The objective is to create continuous, stable support beneath the mat system, rather than using the panels to conceal unsuitable ground conditions.
Practical Considerations for Difficult Terrain
For temporary construction routes crossing soft soil, slopes, or uneven ground, our technical recommendations focus on more than mat thickness. Panel layout, connector compatibility, ground support, and vehicle movement must be considered together.
A 15 mm HDPE mat may provide greater bending stiffness than a comparable 12.7 mm panel made from the same material, but this difference alone does not establish whether either mat is suitable for a particular vehicle or soil condition.
Where concentrated loads, significant slopes, or unstable ground are involved, the installation plan should be reviewed against the actual equipment loads and site conditions before traffic begins.
Once these difficult sections have been secured, the next step is to inspect the entire route, verify that connections and transitions are safe, and confirm that it is ready for vehicle access.
For a closer look at how mat selection, ground conditions, and installation layout come together in an actual project, click below explore one of our ground protection mat case studies, which covers the practical considerations behind a customized temporary access solution.
Case Study: Customized HDPE Ground Protection Mats Improved Installation Efficiency for Outdoor Applications
Case Study: Customiz
Inspect the Route Before Opening It to Traffic
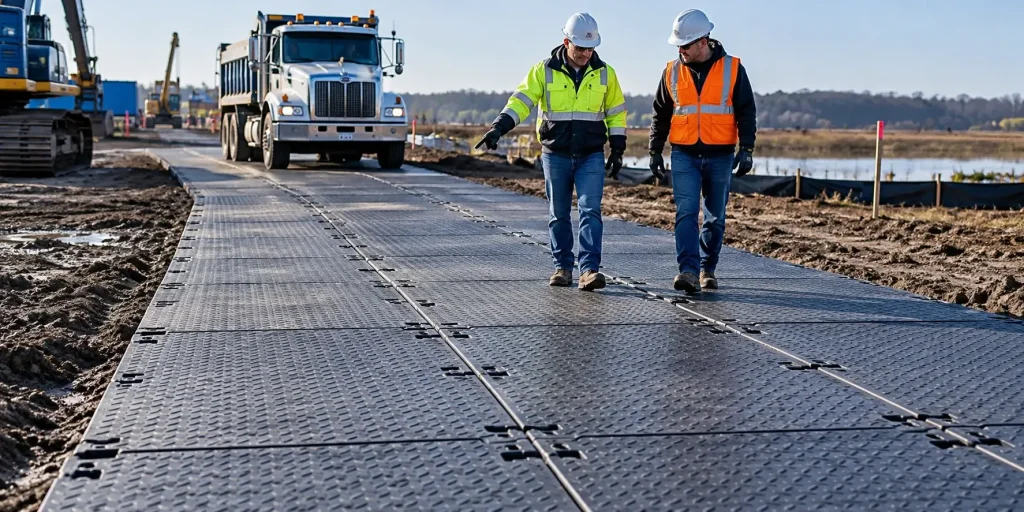
Once the ground protection mats are installed and secured, the route should remain closed to traffic until a final inspection is completed. A properly connected mat system is not automatically ready for use.
The installation team must confirm that the panels are supported, the joints are secure, and the complete route is suitable for the vehicles expected to use it.
The inspection should cover the full route, from the entry point to the exit, with particular attention to transitions, turning areas, and sections over softer ground.
1. Walk the Entire Route and Check Panel Stability
Start with a visual inspection along both sides of the installed route. Look for raised corners, unsupported edges, uneven joints, visible panel damage, or sections that have shifted away from the marked alignment.
Where it is safe to do so, check for unexpected movement under controlled pedestrian loading. However, walking on a panel cannot establish whether the underlying ground will support a loaded truck or construction machine.
For example, a mat may appear level when unloaded but deflect excessively when a vehicle wheel crosses an unsupported section. If a panel rocks, bridges a depression, or has insufficient support near a joint, stop the inspection at that location and correct the issue before allowing vehicle access.
2. Verify Connectors and Entry Transitions
Inspect the installed connectors and the points where vehicles enter, leave, or cross between mat sections.
Pay attention to:
Connector engagement: All required connectors are installed correctly, without missing components or visible damage.
Joint alignment: Adjacent panel edges follow the specified connection design, without unintended gaps or height differences.
Surface clearance: Connector heads or fasteners do not protrude into the intended travel surface.
Entry and exit transitions: Vehicles can approach and leave the mat route without striking unsupported or raised panel edges.
For long temporary roads, inspect connection points along the entire route rather than checking only the first few rows. A loose connector near the far end can still become a problem once loaded vehicles begin passing through.
3. Confirm Vehicle Clearance and Site Safety
The final inspection must also consider how vehicles will use the completed route.
Confirm that the available route width accommodates the intended vehicle and its expected wheel paths, including turning movements. Check for overhead restrictions, nearby excavations, drainage channels, and unstable shoulders that could affect safe passage.
For a route with a nominal width of 3.9 m, the usable width should be assessed against the actual vehicle dimensions, steering clearance, and edge safety margins. The full 3.9 m should not automatically be treated as safe driving width.
Site personnel should also confirm that any required traffic controls, warning signs, and pedestrian separation measures are in place before opening the route.
4. Conduct a Controlled Initial Vehicle Pass
After the installation passes its visual and physical checks, a controlled initial vehicle pass can help identify movement that is not apparent when the mats are unloaded.
Use an appropriate vehicle and loading condition defined by the site supervisor’s risk assessment, with personnel kept outside the vehicle movement and potential mat displacement zones.
During the initial pass, observe from a safe position for:
Excessive mat deflection or rocking under wheel loads.
Panels sliding, rotating, or separating at the joints.
Unexpected wheel slip or loss of traction.
Ground settlement or rut formation beneath the route.
Stop the trial if any unsafe movement occurs. After the vehicle has left the inspection area, recheck the affected panels and connectors before deciding whether corrective work is required.
A successful initial pass is a functional installation check, not proof of the mat system’s maximum load capacity or long-term performance. The specified load limits and ground-bearing requirements must still be respected.
Final Pre-Opening Inspection Checklist
| Inspection Item | Acceptance Requirement |
|---|---|
| Panel Support | No visible rocking, unsupported joints, or excessive movement |
| Connections | Required connectors installed, properly engaged, and undamaged |
| Surface and Transitions | No hazardous raised edges, protruding hardware, or damaged panels |
| Route Clearance | Sufficient width and clearance for the intended vehicle movements |
| Ground and Surrounding Hazards | Unstable shoulders, drainage hazards, and other identified risks controlled |
| Initial Vehicle Pass | No unsafe displacement, excessive deflection, or visible ground failure |
Do not open the route if a safety-critical item remains unresolved. Correct the affected section and repeat the relevant checks before authorizing traffic.
For project handover, photographs of the completed route, connector locations, and any corrected problem areas can provide a useful installation record. Recording the intended vehicle types and site restrictions also helps the operating team understand the conditions under which the route was accepted.
Once the route has passed inspection and is authorized for use, its condition must continue to be monitored. Vehicle traffic, rainfall, and changes in ground support can introduce problems that were not present at the initial inspection.
Monitor, Clean, Reposition, and Remove Mats Safely
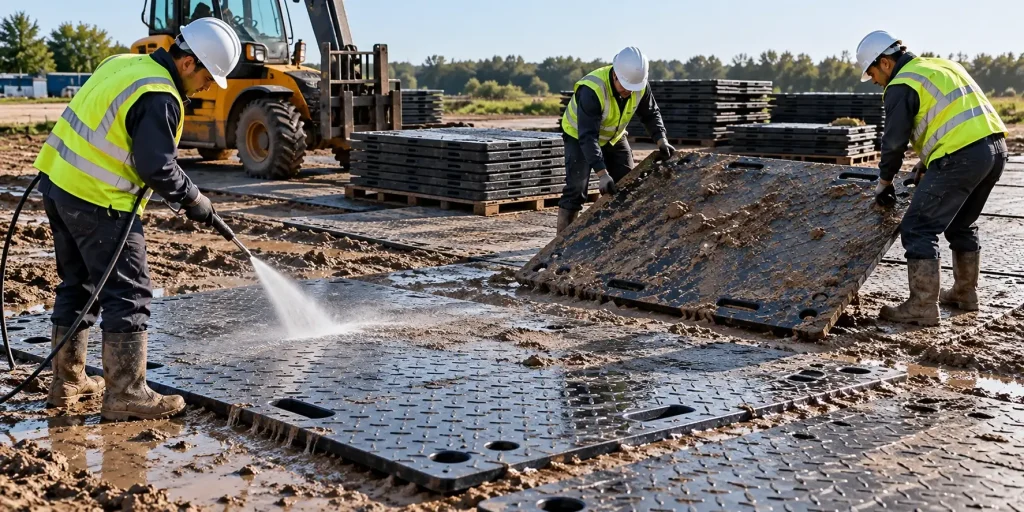
After a ground protection mat route has been opened to traffic, the work is not complete. Regular monitoring and proper handling during use help maintain route stability, protect the mats from unnecessary damage, and support safe removal when the project is finished.
Conditions can change after installation. Rainfall, repeated vehicle movement, soil settlement, and changes in site activity may affect the position and performance of the mat system.
1. Monitor the Route During Use
The inspection frequency should match the site conditions, traffic intensity, and project requirements. A low-traffic pedestrian route and a temporary road used by loaded construction vehicles may require different levels of monitoring.
During use, check:
- Panel alignment: Look for mats that have shifted away from the original route.
- Joint condition: Confirm connectors remain engaged and panels are not separating.
- Surface condition: Check for cracks, excessive wear, or damage caused by sharp objects.
- Ground support: Observe whether soil settlement or erosion has created unsupported sections beneath the mats.
Pay particular attention after events that can change the ground condition, such as heavy rainfall, flooding, excavation work nearby, or a significant increase in vehicle loading.
In practical projects, early correction of a small movement is more efficient than waiting until multiple connected panels require adjustment.
2. Reposition Mats When Movement Occurs
Ground protection mats are designed to distribute loads and create a stable working surface, but external conditions may still cause movement.
If a panel shifts:
- Stop traffic in the affected area.
- Identify the reason for movement, such as soft ground, insufficient support, vehicle turning forces, or connector issues.
- Remove the cause before repositioning the mat.
- Realign the panel and reconnect it according to the system design.
Simply pushing a displaced mat back into position without addressing the underlying cause may result in repeated movement.
For example, if a turning area shifts because vehicles are applying lateral forces beyond the covered area, adding another connector alone may not solve the problem. The route layout or coverage area may need adjustment.
3. Clean and Store Mats Correctly After Use
Cleaning requirements depend on the application environment and the condition of the mats after removal.
Before storage:
- Remove soil, mud, stones, and debris from connection areas.
- Check panels for damage while they are accessible.
- Allow wet mats to drain and dry where required.
- Stack mats in a stable arrangement to prevent unnecessary deformation.
For construction and landscaping applications, cleaning connector areas is particularly important because trapped soil or debris can make future installation more difficult.
HDPE ground protection mats are valued for repeated use, but their service life also depends on proper handling between projects.
4. Remove Mats Safely at the End of the Project
Removal should follow the reverse logic of installation. Do not pull connected mats apart under vehicle traffic or attempt to remove panels while equipment is still operating on the route.
A safe removal process includes:
Step 1: Close the Route
Stop vehicle access and confirm that the area is safe for workers.
Step 2: Disconnect Panels Carefully
Remove connectors according to the mat system design. Avoid excessive force that could damage connection points.
Step 3: Lift and Clean Panels
Lift mats carefully to avoid sudden movement or injury caused by trapped tension between connected panels.
Step 4: Inspect Before Reuse
Check:
- Panel edges
- Connector holes
- Surface condition
- Signs of excessive bending or damage
Panels that remain structurally suitable can be prepared for the next project.
Practical Experience: Plan for the Next Installation
For rental companies, contractors, and users managing multiple projects, removal is not the final step — it is preparation for the next application.
Recording information such as:
- Project location
- Ground conditions
- Vehicle types used
- Installation layout
- Problems encountered
can help improve future planning.
A ground protection mat system performs best when it is treated as a reusable engineering solution rather than a temporary product that is simply placed and removed.
FAQs
Which side of a ground protection mat faces up?
The correct side facing up depends on the mat design and the intended application. Many HDPE ground protection mats use a textured surface on the traffic side to improve traction, while the smoother side may be designed for easier placement or different ground contact conditions.
Always follow the manufacturer’s recommended installation direction, especially for mats with different top and bottom textures or specific interlocking designs.
Can ground protection mats be laid by one person?
It depends on the mat size, thickness, weight, and site conditions. Smaller and lighter panels may be handled by one person, while larger HDPE mats such as 4 ft × 8 ft panels may require two people or handling equipment for safer installation.
Before manual handling, check the actual panel weight, surface condition, and available gripping points. Do not assume connection holes or handle holes are approved lifting points unless specified by the manufacturer.
For projects involving long access routes or repeated installation, using suitable handling methods can improve efficiency and reduce the risk of improper positioning.
Should the ground be leveled before mats are installed?
Yes, the ground should be prepared as much as the site conditions require. Mats can accommodate minor surface variations, but they are not designed to replace proper ground preparation.
Remove sharp debris, reduce significant uneven areas, and ensure sufficient support beneath the panels before installation. Soft soil, deep ruts, or unsupported sections may require additional ground improvement.
How should mats be connected on a curve?
On curves, mats should be arranged according to the vehicle turning path rather than following a simple straight-line layout. The connection system should keep adjacent panels aligned while providing enough coverage for the vehicle’s wheel path.
For turning areas used by trucks or heavy equipment, additional coverage may be needed because tires create lateral forces during steering. Avoid placing joints directly in areas exposed to concentrated turning forces where possible.
Do ground protection mats need anchors on slopes?
Anchoring may be required on slopes depending on the gradient, ground condition, vehicle movement, and mat system design. Edge connectors alone may not prevent movement when downhill braking, acceleration, or wet ground conditions create sliding forces.
Before using mats on sloped areas, evaluate whether the route has sufficient ground support and whether additional restraint measures are suitable for the specific installation.
Can mats be installed over standing water?
Ground protection mats should not be installed directly over standing water without assessing the underlying ground condition. Water can indicate poor drainage or weak soil support, which may affect mat stability after vehicle traffic begins.
Remove excess water where possible and ensure the ground beneath the mats provides adequate support. Areas with saturated soil, deep mud, or unstable foundations may require additional preparation before installation.
How often should an installed mat route be inspected?
The inspection frequency depends on traffic intensity, ground conditions, weather changes, and project requirements. A temporary route used by heavy equipment requires more attention than a low-traffic pedestrian pathway.
At minimum, inspect the route after events that may affect stability, such as heavy rainfall, flooding, significant changes in vehicle loads, or visible panel movement. Regular checks should focus on connections, alignment, ground support, and damaged sections.
How are muddy ground protection mats removed?
Muddy mats should be removed carefully after closing the route and stopping vehicle traffic. Do not pull connected mats forcefully while they are still under tension, as this may damage connectors or create unsafe movement.
A practical removal process includes disconnecting panels in sections, lifting them with suitable handling methods, removing trapped mud from connection areas, and inspecting the mats before storage or reuse.
For heavily contaminated mats, cleaning before stacking helps prevent debris from affecting future installation.
Partner with a Professional Engineering Plastics Manufacturer
We provide stable and reliable engineering plastic sheets and custom processing solutions for your projects
Explore More Blogs


Hey There, I'm Balance!
I am the Supply Chain Manager of YIQI Plastic. With 9 years of experience, including 4 years in engineering plastics, I specialize in material sourcing, quality control, and supply chain management. Feel free to contact us.