
Home » How to Pick the Best Ground Protection Mats
How to Pick the Best Ground Protection Mat
- Author: Balance Lee
- 9+ Years of Manufacturing
To choose the best ground protection mats, first understand the specifics of your project—rather than simply selecting the thickest or sturdiest product. You need to comprehensively consider vehicle loads, ground conditions, mat materials, dimensions, and installation requirements to find a solution that protects the ground without incurring unnecessary costs.
This guide will walk you through each of these key factors, helping you make practical choices based on your job site, equipment, and project timeline.
Table of Contents
Define the Vehicles, Loads, Route, and Project Duration
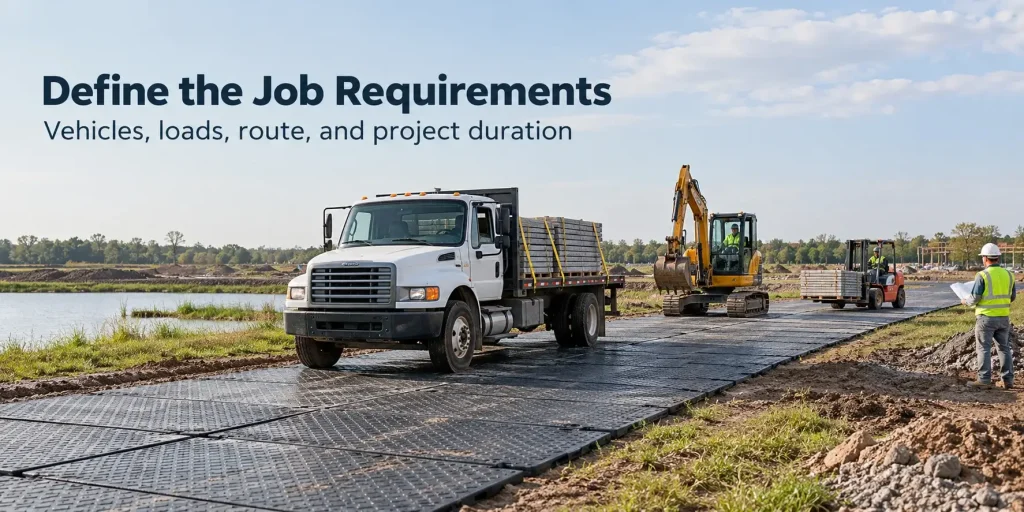
Before comparing the materials or thicknesses of ground protection mats, you need to first determine their specific intended use. A vehicle’s total weight alone is not sufficient to determine the required strength of the protection mats. The weight distribution, the type of road the vehicle travels on, and the duration of use on that road can all affect the choice of protection mats.
1. Identify Vehicle Types and Actual Loads
First, list all vehicles or equipment that will use the protected route, including delivery trucks, excavators, forklifts, and cranes.
Pay paticular attention to the following three measurements:
• Gross vehicle weight: Includes the vehicle itself, attachments, fuel, cargo, and other operational loads. Use the estimated maximum operating weight, not the empty vehicle weight.
• Axle and wheel loads: A 30-metric-ton truck does not exert a 30-metric-ton load at every contact point. The load is distributed across the axles and tires, and this distribution may change during loading, braking, or turning.
• Contact configuration: Pneumatic tires, solid forklift tires, and steel tracks transmit pressure differently. Even with lighter equipment, a smaller contact area can result in higher localized pressures.
When reviewing heavy equipment projects, we pay particular attention to the contact conditions of the loaded wheels or tracks, rather than relying solely on the vehicle’s total weight. Without understanding the support conditions beneath the mats, the manufacturer’s rated load alone is insufficient to confirm suitability.
For stationary cranes or equipment that operates using outriggers, their support requirements should be evaluated separately from the vehicle’s travel route.
2. Map the route and traffic pattern
Once the equipment has been selected, how it will move across the site should be assessed. A straight acess road places different demands on mats than a narrow route with frequent turning and braking.
| Route Factor | What to Check | Why It Matters |
|---|---|---|
| Travel Distance | Total route length and required coverage width | Determines mat quantity and layout |
| Traffic Frequency | Estimated loaded passes per day | Repeated loading can increase rutting and ground deformation |
| Turning Areas | Corners, reversing points, and loading zones | Tire scrubbing and lateral forces can increase mat movement |
| Traffic Direction | One-way access or two-way vehicle movement | Affects route width and connector arrangement |
| Loading Points | Areas where vehicles stop, unload, or operate equipment | Stationary or concentrated loads may require additional assessment |
Special attention is required at turns. For projects involving loaded trucks, we prefer to first identify the turning and unloading areas before recommending a mat layout, rather than calculating the required quantity based solely on the route length.
For example, a 60-meter-long route with a protective width of 3 meters has a nominal coverage area of 180 square meters. However, this calculation does not account for turning areas, overlaps, trimming, or the extra material needed for site-specific installation.
3. Consider project duration and Repeated Use
A temporary access route used for three days creates a different purchasing decision from one that remains installed for three months.
Consider the following scenarios:
• Short-term aisles: For temporary cargo deliveries or equipment movement, as long as the mats meet load and floor requirements, installation speed, load-bearing capacity, and ease of removal may be priority considerations.
• Long-term projects: When floor mats need to remain in place for weeks or months, it is important to inspect the joints, drainage, and any ground deformation throughout the installation period.
• Recurring projects: If the same set of mats will be moved between different construction sites, factors such as durability, stacking efficiency, cleaning, and the replacement of connectors will have a more significant impact on long-term costs.
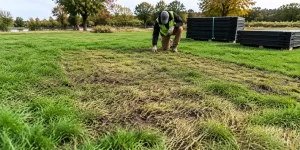
Project duration also affects the ground itself. On grassy areas, prolonged coverage can restrict light and air exchange, while repeated heavy traffic may lead to soil compaction beneath the mats. Removing the mats does not automatically reverse soil compaction or vegetation damage.
4. Prepare the basic project information
Before requesting a recommendation or quotation, collect the following details:
• Maximum loaded vehicle weight and axle loads (if applicable)
• Tire type, wheelbase, or track dimensions
• Length, width, and turning areas
• Estimated daily traffic and project duration
• Any fixed loading , crane outriggers, or equipment support points
These details will help your suppliers assess the actual loading conditions rather than recommending load-sharing pads based on vehicle weight alone.
Evaluate Soil, Turf, Pavement, Slopes, and Drainage
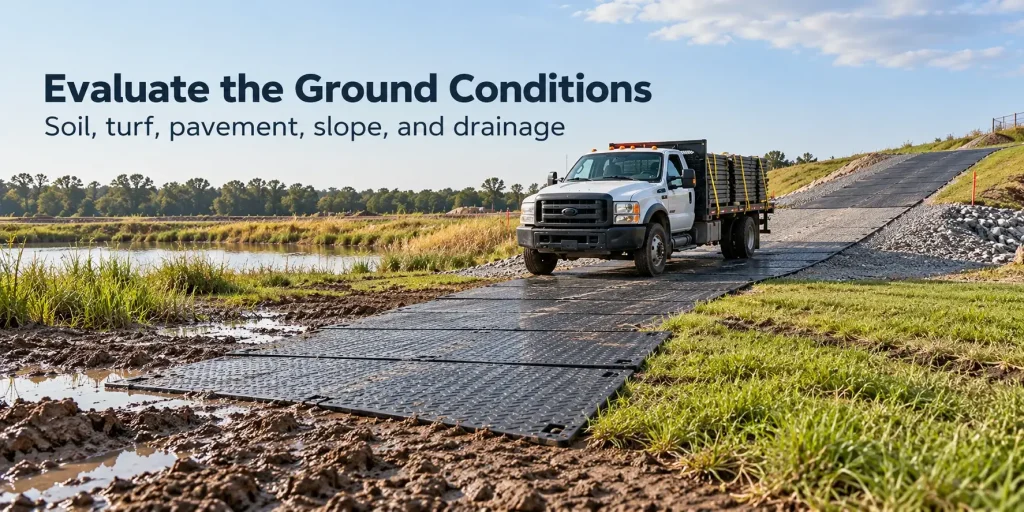
Once you know the vehicle load and route, the next step is to assess the ground conditions beneath the mats. Even with the same vehicle load, the same type of ground protection mat will perform differently on hard gravel, damp clay, or soft grass. Before selecting a mat, please check the following site conditions.
1. Match the Mat to the Ground Surface
Different types of flooring present different risks. The key is to identify whether the ground needs protection against surface damage, excessive pressure, or both.
| Ground Condition | Main Risk | What to Consider |
|---|---|---|
| Soft Soil or Wet Clay | Rutting, sinking, and uneven support | Greater load distribution, adequate mat stiffness, and a stable subgrade |
| Natural Grass or Turf | Root damage, soil compaction, and surface wear | A relatively smooth underside, limited traffic passes, and shorter installation periods |
| Sand or Loose Gravel | Shifting material and localized sinking | Broad contact area, ground leveling, and suitable mat connections |
| Asphalt or Concrete | Surface scratches, concentrated pressure, and mat movement | Clean contact surfaces, suitable underside texture, and movement control |
A solid surface is not necessarily a stable one. For example, dry clay may be able to support a vehicle when first driven on, but it may lose its load-bearing capacity after rainfall. For this reason, ground conditions should be assessed throughout the entire project lifecycle, not just on the day of installation.
2. Check Slopes and Drainage Before Installation
Ground protection mats help distribute the load, but they cannot correct poor drainage issues or make unstable slopes safe.
Pay paticular attention to:
• Slopes: Check the steepest sections of the route, especially where vehicles brake, accelerate, or turn. The steeper the slope, the higher the risk of vehicles losing traction and the mats shifting.
• Drainage: Identify low-lying areas where rainwater accumulates. Standing water beneath the protective mats can soften the soil and weaken its load-bearing capacity under repeated vehicle traffic.
•Uneven Road Surfaces: Remove sharp debris and address deep ruts or protruding obstacles that could cause sections of the protective mat to lose support.
For projects involving repeated passage of heavy vehicles, inspect ground conditions after rainfall and during the first loaded pass. Newly formed ruts, visible subsidence of the protective mat, or water seeping from the edges all indicate that the underlying support may be insufficient.
3.Verify the Ground, Not Just the Mat
Through on-site surveys, you can identify issues that are easily overlooked when selecting floor mats based solely on product specifications.
Before confirming your order, please document the ground types along the planned route, conditions during rainy weather, slope orientation, drainage points, and any visible weak spots. For high-load applications or situations where ground strength is uncertain, a professional on-site assessment may be required to determine whether additional subgrade treatment is necessary.
Once these conditions are clarified, you can proceed to select the appropriate mat material, thickness, and load-bearing capacity, rather than relying solely on the maximum load values provided by the manufacturer.
Choose Material, Thickness, and Load Capacity
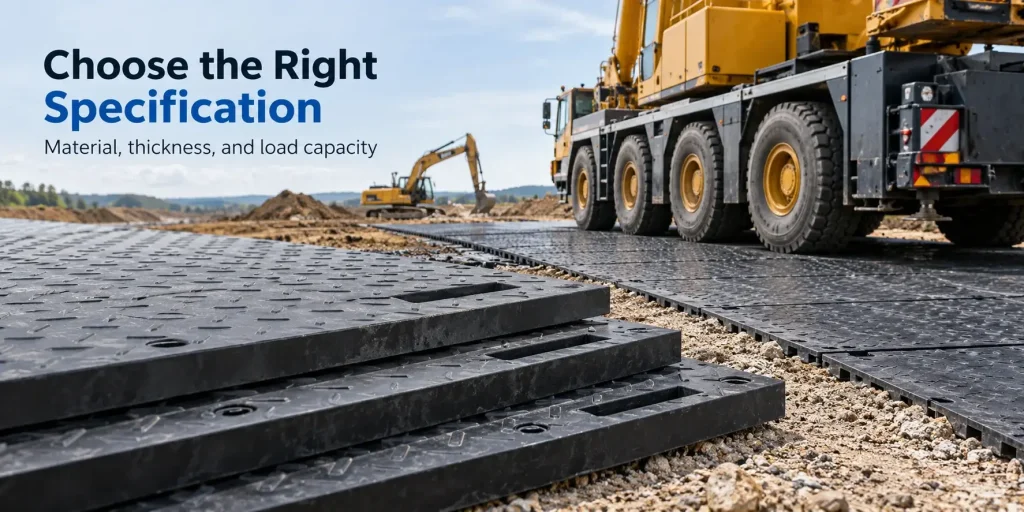
Once the vehicle load and ground conditions are established, you can narrow down your options for the material and thickness of the ground protection mats. The best choice is not necessarily the thickest mat, nor is it necessarily the mat with the highest rated load capacity; rather, it is the mat that provides sufficient stiffness, impact resistance, and load distribution capabilities for your specific on-site conditions.
1. Compare HDPE, UHMWPE, and Composite Mats
Material selection affects the mat’s bending performance under load, its resistance to surface wear, and its performance over multiple projects. The following three options are worth considering:
| Material | Key Characteristics | Suitable Applications | Selection Considerations |
|---|---|---|---|
| HDPE | Good stiffness, impact resistance, moisture resistance, and cost efficiency | Temporary access roads, construction sites, landscaping, and utility maintenance | A practical starting point for reusable mats where stiffness and handling cost matter |
| UHMWPE | Excellent abrasion resistance, impact toughness, and low-friction material properties | Abrasive ground conditions, frequent equipment movement, and demanding reuse cycles | Higher material cost; low surface friction does not automatically provide better vehicle traction |
| Engineered Composite Mats | Reinforced or multi-component construction, with properties varying by design | Heavy-duty access roads, industrial sites, and equipment platforms | Compare tested assembly performance, internal structure, and installation requirements |
For temporary walkways, HDPE is the preferred choice because it strikes a balance between structural rigidity, durability, and procurement cost. When surface wear or repeated impact becomes a primary concern, UHMWPE is more suitable. Composite material systems should be evaluated as complete products, rather than judged by the material name alone. For a broader look at material selection beyond ground protection mats, see our guide on how to choose HDPE sheets for construction projects.
One detail worth confirming with your suppliers is whether the product is made from virgin material, recycled material, or a controlled blend. The presence of recycled material does not necessarily imply inferior performance, but material uniformity, impact resistance, and traceable test results are more important than a simple “virgin vs. recycled” label.
2. Select Thickness based on bending resistence
Thickness is particularly important when a mat spans small depressions or distributes wheel loads across uneven ground.
For a solid rectangular mat of the same material and width, bending stiffness increases approximately with the cube of its thickness, under comparable simple bending conditions.
For example:
• Increasing the thickness from 10 mm to 15 mm raises the theoretical bending stiffness by approximately 3.4 times.
• Increasing the thickness from 10 mm to 20 mm increases the theoretical bending stiffness by approximately 8 times.
These are structural comparisons and do not represent an increase in rated load-bearing capacity. The actual performance of the mat also depends on the ground support, material behavior, surface geometry, and load conditions.
The following thickness ranges can serve as preliminary selection criteria for solid polyethylene mats:
| Mat Thickness | Initial Selection Considerations | What to Verify |
|---|---|---|
| 10–12.7 mm | An initial option for applications with relatively low bending demands and well-supported ground conditions | Actual wheel loads, subgrade firmness, contact area, and repeated traffic |
| 15–20 mm | Provides greater theoretical bending stiffness than thinner solid mats of the same material and structural design | Loaded axle or wheel conditions, ground support, acceptable deflection, and traffic frequency |
| 25–40 mm | A potential option where increased bending stiffness is required, subject to product design and load verification | Concentrated loads, subgrade bearing capacity, structural thickness, and handling requirements |
| Above 40 mm | Considered for specialized systems requiring additional structural depth or project-specific engineering evaluation | Complete mat construction, verified load performance, ground support, and mechanical installation needs |
Note: These thickness ranges are intended for preliminary product screening only, not certified load classes. Actual suitability depends on the mat's structural design, loaded wheel or track contact conditions, subgrade support, and verified product performance. Thickness alone should not be used to approve vehicle access.
When reviewing ground protection mat specifications, we also distinguish between the thickness of the solid load-bearing body and the total thickness, which includes the raised anti-slip grooves. A mat described as 20 mm thick may not have a 20 mm structural core if the published dimension includes the tread height. That difference matters when comparing bending performance.
3.Verify Load Capacity Under Actual Site Conditions
A manufacturer’s claim that a mat can withstand a load of 40, 80, or 100 metric tons is incomplete unless the test or usage conditions are specified. The rated load can vary significantly depending on the pad’s structure, contact area, and the support provided by the underlying foundation.
Consider a simplified example:
A wheel exerts a vertical load of 50 kN, equivalent to approximately 5.1 tonnes- force.
If this force is evenly distributed over the following support areas:
• 0.25 m²: Average pressure = 200 kPa
• 0.50 m²: Average pressure = 100 kPa
When the effective load-bearing area doubles, the calculated average pressure is halved. However, a mat does not automatically distribute the load across its entire surface. Its stiffness, deflection, and contact with the underlying ground collectively determine how much of the area actually participates in load transfer.
For high-load applications, ask your supplier to confirm:
• Rated load conditions: What type of ground support, contact area, and test methods were used?
• Load distribution: Is the equipment supported by tires, tracks, or concentrated support points?
• Deflection limits: Under the planned load, what range of deflection is acceptable for the mat?
• Repeated loading: Has performance been evaluated for the expected traffic patterns?
For cranes operating with outriggers, the required bearing pressure and mat layout should be calculated separately. Standard traffic mats should not be considered certified outrigger support systems without proper engineering verification.
4. Balance Structural Performance With Practical Handling
Selecting a thicker mat can improve bending strength, but it also increases material weight, transportation costs, and installation effort.
For example, assuming the use of solid HDPE with a density of 950 kg/m³, the theoretical material weight of a flat mat measuring 1,220 × 2,440 mm is as follows:
| Thickness | Approximate Weight |
|---|---|
| 10 mm | 28.3 kg |
| 15 mm | 42.4 kg |
| 20 mm | 56.6 kg |
| 30 mm | 84.8 kg |
Calculation basis: 1,220 × 2,440 mm solid HDPE sheet with an assumed density of 950 kg/m³. Actual finished mat weights may vary depending on tread patterns, handles, holes, and product design.
This illustrates a practical trade-off: doubling the thickness doubles the material weight, but the rated load capacity does not double. If the ground is already firm and the equipment load is moderate, increasing the thickness may raise costs and make handling more difficult without providing corresponding benefits.
Before finalizing specifications, request a product drawing that specifies structural thickness, overall dimensions, surface profile, and weight, along with proof of load-bearing performance relevant to your operating conditions.
Compare Mat Size, Weight, and Handling Requirements
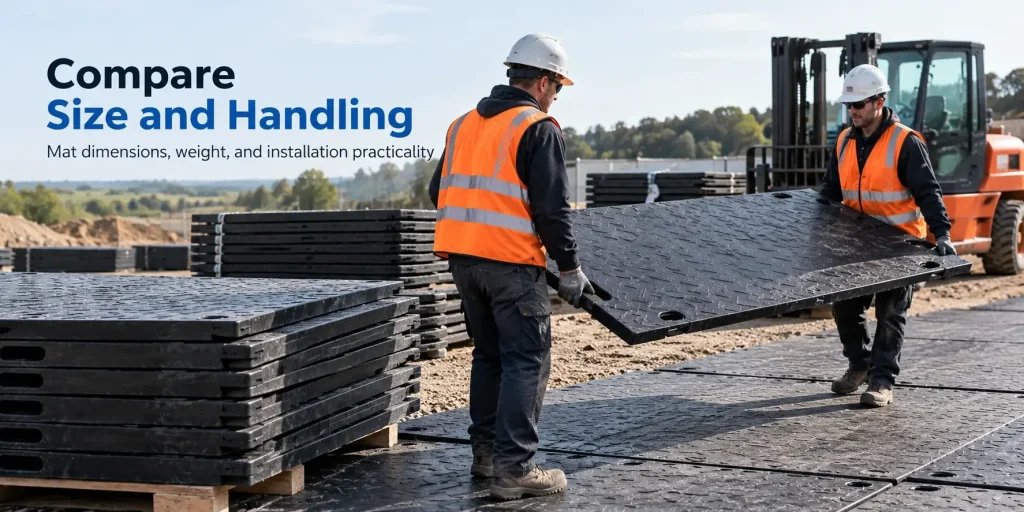
Once you have selected the material and thickness, the next step is to determine the size of each ground protection mat. Larger mats cover a wider area and have fewer seams, but they also require more space, greater handling effort, and higher transportation capacity. The appropriate size should match your traffic routes while ensuring that your team can safely install, reposition, and remove these mats.
1. Match Mat Dimensions to Your Access Route
Please select your mats based on the actual available width of the route, rather than relying solely on the dimensions listed in the product catalog. The layout must take into account the vehicle’s width, tire placement, turning clearance, and any necessary clearance around the edges.
Mat sizes to consider include:
| Mat Dimensions | Coverage per Mat | Practical Considerations |
|---|---|---|
| 1,220 × 2,440 mm (4 × 8 ft) | 2.98 m² | Suitable for modular access routes; check orientation and joint positions |
| 1,000 × 2,000 mm | 2.00 m² | Easier to arrange in restricted spaces, with more joints over the same area |
| 1,500 × 3,000 mm | 4.50 m² | Covers a larger area per panel but requires more handling and transport space |
| 2,000 × 4,000 mm | 8.00 m² | Reduces panel count; mechanical handling and vehicle dimensions need particular attention |
Note: Dimensions are illustrative product-size options, not universal industry standards. Availability depends on the manufacturer.
For example, a 60 m × 3 m temporary access route requires a nominal coverage area of 180 square meters. If 1,500 × 3,000-millimeter mats are used, with the 3-meter side spanning the width of the passageway, 40 mats would cover this rectangular area—before accounting for seams, turns, or other on-site requirements.
While this may seem efficient on paper, the layout must also account for the locations of entrances, curves, and panel seams. A drawing illustrating the actual installation layout is more practical than estimating the quantity based solely on the total square meters.
2. Caculate weight before choosing a handling method
Mat weight increases directly with size and thickness for the same solid material. Even a modest increase in panel dimensions can make a noticeable difference during installation.
For a solid HDPE mat, you can estimate theoretical weight using:
Weight (kg) = Length (m) × Width (m) × Thickness (m) × Density (kg/m³)
Assuming an HDPE density of 950 kg/m³:
• 1,000 × 2,000 × 15 mm: approximately 28.5 kg
• 1,220 × 2,440 × 15 mm: approximately 42.4 kg
• 1,500 × 3,000 × 15 mm: approximately 64.1 kg
These weights exclude changes caused by handles, machined openings, and surface patterns.
A 42 kg panel is not necessarily suitable for two-person manual handling simply because each worker would theoretically support half its weight. Panel dimensions, grip position, wind, uneven ground, and the distance carried all affect handling safety. Use a task-specific manual-handling assessment rather than a fixed weight threshold.
3. Check lifting points, stacking and Site access
You should consider handling requirements before placing an order, especially when installing floor mats without specialized lifting equipment.
The following three details may have a significant impact:
• Integrated grip holes: Rounded, easy-to-grip holes can improve grip strength and positioning accuracy, but their location and the remaining material around the openings must be compatible with the product design.
• Mechanical Lifting: For large or heavy panels, verify the availability of rated lifting points, compatible lifting attachments, and appropriate equipment. Never treat hand holes as certified lifting points.
• Stacking and Unloading: Check pallet dimensions, stacking height, forklift access conditions, and the space required to separate individual panels (ensuring that panels do not drag on the ground during separation).
In projects requiring multiple movements of shims, we would pay close attention to how the crew removes the first panel from a stack and positions the next one. A mat that fits the access road perfectly may still slow down installation if workers cannot grip it safely or maneuver it around obstacles.
Also confirm that the delivery vehicle can reach the unloading area. Restricted gates, overhead clearances, and limited turning space can influence the practical mat size before installation even begins.
4. Balance Installation Efficiency Against Panel Count
Larger ground protection mats can reduce the number of individual panels and, with a well-designed layout, also minimize the number of seams. However, fewer panels do not necessarily mean faster installation.
Take a 180-square-meter rectangular installation area as an example:
• 2 m² panels: 90 mats
•4.5 m² panels: 40 mats
Both figures assume that the coverage area is a perfect rectangle, with no cutting waste or additional overlap allowance.
The larger solution can reduce the number of panels by approximately 56%, but each panel may require heavier equipment, longer positioning time, or greater coordination among construction workers.
For repetitive projects, in addition to comparing unit prices, it is important to comprehensively consider factors such as installation time, the number of workers, lifting equipment, transportation space, and dismantling time. The impact of these factors may far outweigh minor differences in initial procurement costs.
Select Tread Patterns and Connector Systems
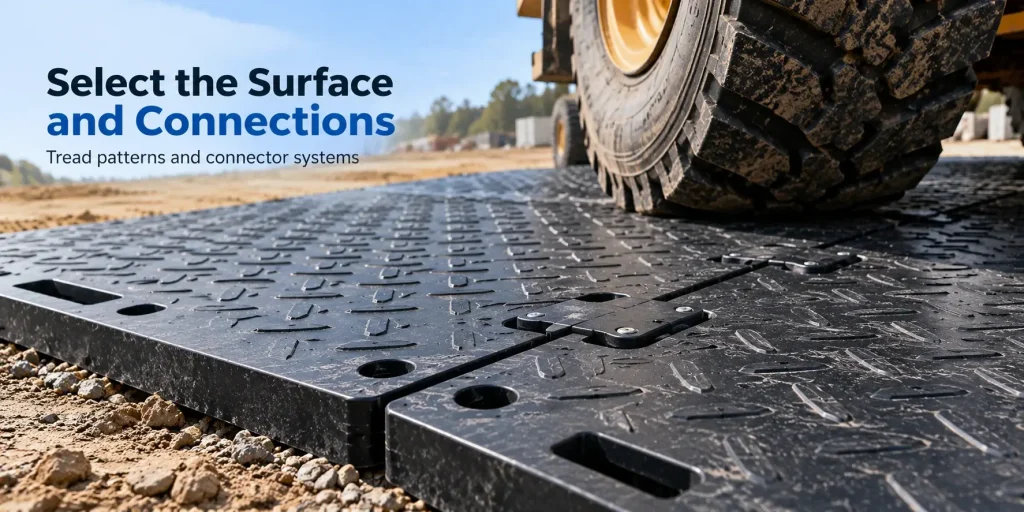
Once the mat dimensions and installation method have been determined, the next consideration is how the mats will perform while the vehicle is in motion. The surface pattern affects traction, while the connectors help control movement between adjacent mats. Both of these factors must be suited to driving conditions, especially when the vehicle is turning, braking, or traveling on slippery roads.
1. Choose a tread pattern based on traffic and surface conditions
Ground protection mats are available in a variety of surface designs, including diamond, herringbone, and raised anti-slip patterns. These designs can enhance the mechanical interaction between the tire and the mat surface, but their effectiveness depends on the type of tire, the tread geometry, and the extent of contamination from mud or water.
| Tread Pattern | Main Characteristics | Selection Considerations |
|---|---|---|
| Diamond Tread | Multi-directional raised texture | Suitable for routes involving straight travel and turning; check tread height and tire compatibility |
| Chevron Tread | Angled ribs forming a directional pattern | Can provide traction features along preferred travel directions; confirm installation orientation |
| Raised Grip Pattern | Distributed protrusions or textured contact points | Compare grip, walking comfort, cleanability, and tire contact |
| Smooth Surface | Minimal raised texture | Easier to clean and position, but may provide less traction under wet or muddy conditions |
Deeper tread patterns do not necessarily provide better grip. Mud can accumulate between the raised tread blocks, reducing the effective contact area between the tire and the ground. Additionally, tires with overly aggressive tread patterns may not be suitable for certain small, hard-wheeled vehicles or pedestrian-traffic scenarios.
When comparing samples, we focus not only on the appearance of the tread pattern but also on tread depth, tread spacing, edge geometry, and how easily accumulated dirt can be removed. For road sections shared by vehicles and pedestrians, the traction requirements of both should be evaluated simultaneously.
2. Check the underside pattern, not just the driving surface
The upper surface interacts with tires and footwear, while the underside influences how the mat contacts the ground.
A textured underside may help resist movement on suitable soil or turf. However, raised features can also leave impressions on sensitive surfaces or create uneven contact over hard pavement.
For example:
• Soft soil: An underside texture may provide additional mechanical engagement, provided the soil can support the applied loads.
• Natural turf: Less aggressive contact features may reduce localized surface disturbance, although repeated vehicle loads can still compact the soil.
• Concrete or asphalt: Check whether raised underside features could scratch the surface or reduce stable contact.
For reversible mats, confirm whether both faces are designed for vehicle traffic. A double-sided tread pattern is not automatically suitable for every ground surface, particularly where protecting finished pavement or sensitive grass is a priority.
3. Select Connectors According to the Mat Layout
Connectors help keep adjacent mats aligned and limit the gap between them when the vehicle accelerates, brakes, or turns. The required arrangement depends on the mats’ geometry, the available connection holes, and the direction of traffic.
Two-way and four-way connectors are suitable for different layout positions:
| Connector Type | Connection Arrangement | Practical Application |
|---|---|---|
| 2-Way Connector | Joins two adjacent mats | Straight joints, route edges, and locations where two panels meet |
| 4-Way Connector | Connects four mat corners at a shared intersection | Grid layouts and internal junctions where four panels meet |
In longer passages, we pay special attention to turns and areas where tires repeatedly roll over panel seams. The lateral forces exerted on these sections may differ from those experienced during straight-line travel.
Therefore, the number of connectors should be calculated based on the actual layout diagram, rather than simply multiplying by the number of mats.
In addition, it is necessary to check whether the connectors are flush with the mat’s surface, protrude above it, or are installed beneath the panels. If protruding connectors are incompatible with the intended traffic flow, they may create gaps or pose a tripping hazard.
4. Verify connector fit and movement control
A connector should be compatible with the geometry and thickness of the holes in the mat, as well as the intended installation method. If the connector are installed too loosely, they may cause excessive displacement; conversely, if the connector are incompatible and the connection is too tight, stress concentrations will occur around the holes.
Before confirming your order, please check the following:
• Hole Alignment: The mounting holes must match the dimensions of the provided connectors and the allowable installation tolerances.
• Connector Material: Verify that the material is sufficiently strong and can withstand the expected humidity, temperature, and on-site conditions.
• Joint movement: Determine the allowable amount of displacement or gap between adjacent panels.
• Inspection access: Ensure that connectors can be inspected, tightened if necessary, and replaced.
For repetitive installation projects, removable connectors can simplify the disassembly and replacement process. However, please note that connectors are not a substitute for proper ground support, traction, or slope stability measures.
If significant lateral displacement is anticipated, additional restraint measures or adjustments to the subbase layout may be required. The appropriate solution should be determined based on the manufacturer’s installation instructions and actual site conditions.
5. Test the layout before full installation
For routes with higher performance requirements, a short test section can be used to identify any issues before installing the full mat system.
Lay several mats joined together on a representative section of the route, and then evaluate their performance under controlled vehicle traffic conditions in accordance with approved on-site procedures.
Check the following:
• Whether there is any noticeable separation of the panels or loose fasteners
• Whether the mats shift excessively during turns or braking
• Whether the wheels are slipping or the tread is clogged with mud
• Whether there are raised edges,unstable joints, or damaged connection holes
If significant displacement or traction issues are identified during the test run, adjust the tread selection, connector layout, ground preparation, or traffic plan before extending the route.
Once the requirements for the tread and connectors have been confirmed, the next step is to verify that the selected tread system can withstand the expected on-site weather, UV exposure, chemical exposure, and temperature conditions throughout the project.
Check Weather, UV, Chemical, and Temperature Resistance
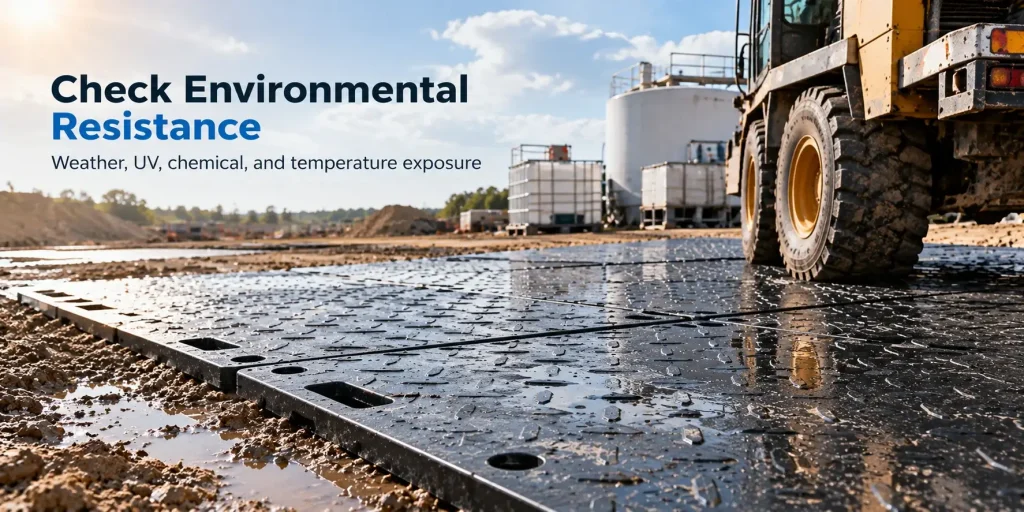
A mat system that performs well during installation may be exposed to varying environmental conditions after several weeks of outdoor exposure. Sunlight, temperature fluctuations, moisture, and exposure to chemicals can all affect the material’s performance, dimensional stability, and long-term durability. Before finalizing your selection, verify that the mat’s material composition and operation restrictions are compatible with the environmental conditions that will be present throughout the project.
1. Verify UV Resistance for Outdoor Exposure
HDPE can be used outdoors, but not all HDPE formulations offer the same UV resistance. Without proper stabilization, prolonged exposure to sunlight may result in surface oxidation, discoloration, and a decline in mechanical properties.
Carbon black is an effective UV stabilizer for polyethylene. As a reference, black PE pipe composites containing approximately 2% to 2.5% of well-dispersed carbon blac(Source:PE100+Association-UV Resistance of PE Pipes) have demonstrated strong resistance to UV degradation. However, this formulation used in the pipe industry should not be considered a mandatory specification or a guarantee of service life for ground protection mats.
When evaluating mats for outdoor storage or long-term installation, you can check the following:
• UV stability: Confirm whether the formulation contains carbon black or other suitable UV stabilizers.
• Color options: Colored mats may require a different combination of stabilizers than black floor mats.
• Performance verification: Request weather resistance test results or documented specifications for outdoor use, especially for projects involving prolonged exposure to sunlight.
When it comes to material selection, we focus more on stabilization formulations and the corresponding test data than on simple marketing claims such as “10 years of UV resistance.” Without clearly defined exposure conditions and performance standards, the service life claimed in advertisements is of little significance.
2. Account for High Temperature, Freezing, and Thermal Expansion.
Temperature affects the stiffness and dimensions of polyethylene mats. As the temperature rises, the stiffness of HDPE may decrease; at extremely low temperatures, the material’s impact resistance must be taken into account.
A published technical data sheet for HDPE sheets specifies an operating temperature range of −50°C to +80°C; however, this is merely a reference value for that specific material and does not represent a universal safe operating temperature range for load-bearing ground protection mats.
A more practical concern is thermal expansion. HDPE sheet can have a linear thermal expansion coefficient of approximately 0.15–0.20 mm per meter per °C.
For example, a 2-meter-long HDPE mat, when subjected to a uniform temperature increase of 30°C and allowed to move freely, may expand by approximately 9–12 millimeters along that dimension.
This directly affects installation:
• High-temperature environments: Check surface temperatures, the expected duration of the load, and whether the fasteners allow for the required displacement.
• Low-temperature environments: Verify low-temperature impact resistance, particularly if the sheets may be dropped or handled while frozen.
• Environments with significant temperature fluctuations: Review joint spacing and fastener tolerances to avoid excessive restraint or sheet deformation.
Air temperature is not the same as the surface temperature. A black mat course exposed to direct sunlight may reach temperatures significantly higher than the surrounding air. For high-temperature projects, the suitability of materials should be verified based on the expected mat temperature under load, rather than relying solely on daytime weather forecasts.
3. Check chemical compatibility before exposure
HDPE exhibits good resistance to many aqueous salts, dilute acids, and alkalis, making it suitable for a wide range of industrial environments. However, its chemical resistance is not universal. Strong oxidizing agents and certain organic solvents may cause polyethylene to degrade, swell, or suffer other effects, depending on concentration, temperature, and duration of exposure.
Considerate the followings when reviewing the site:
| Exposure Condition | Potential Concern | Recommended Check |
|---|---|---|
| Rainwater and Wet Soil | Persistent moisture, contamination, and reduced ground support | Confirm drainage and inspect the underlying ground |
| Diesel, Oil, and Hydraulic Fluids | Possible swelling or property changes during prolonged contact | Check chemical compatibility for the specific fluid and exposure period |
| Cleaning Agents and Detergents | Potential environmental stress cracking under certain chemical and mechanical conditions | Verify compatibility with the cleaning formulation |
| Acids, Alkalis, or Industrial Chemicals | Chemical attack depending on concentration and temperature | Review a grade-specific chemical resistance chart |
Note: Chemical compatibility depends on the specific HDPE grade, chemical concentration, exposure temperature, and contact duration. Confirm material suitability with the supplier before prolonged chemical exposure.
A short, accidental spill is different from continous exposure. Where mats will be used around fuel storage, industrial washing, or chemical handling areas, identify the exact substances and expected contact duration before confirming material suitability.
If there are doubts about compatibility, request a sample or conduct a chemical resistance assessment for that specific product, rather than assuming that all HDPE grades perform identically.
4. Confirm Environmental Performance before ordering
For long-term outdoor projects, it is recommended to verify the manufacturer’s technical specifications against the following four on-site conditions: maximum and minimum temperatures, sunlight intensity, exposure to chemicals, and installation duration.
In addition, the product’s fasteners and other components should be inspected. The environmental limitations for metal fasteners, polymer connectors, and lifting hardware may differ from those of the HDPE mat itself.
Our goal is not to find a material that claims to withstand all environments, but rather to confirm that its performance is sufficient to handle the actual conditions it will face.
Compare Purchase, Rental, Lifespan, and Total Cost
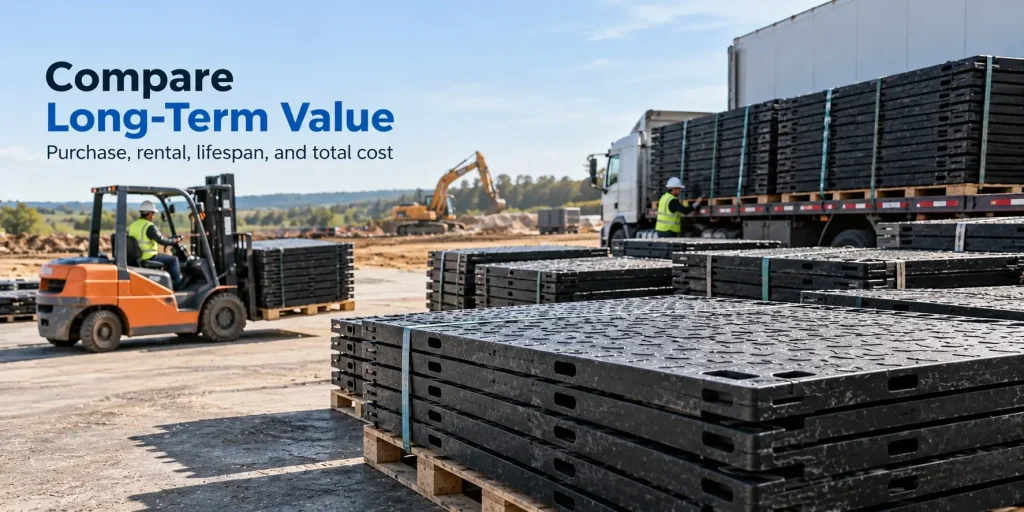
After confirming the mats’ load capacity, dimensions, connection methods, and environmental suitability, the technical selection process is largely complete. The next consideration is the financial aspect: For this project, should we purchase the floor mats or rent them? The answer depends not only on the quoted price but also on factors such as the project duration, transportation distance, installation labor, maintenance, and future reusability, all of which affect the actual cost.
1. Compare Buying and Renting Based on Project Needs
For short-term, one-time projects, renting can reduce the initial investment, while purchasing gives you control over the supply, specifications, and future deployment of the mats.
| Cost Factor | Purchasing Mats | Renting Mats |
|---|---|---|
| Initial Cost | Higher upfront investment | Lower initial payment, depending on rental terms |
| Project Duration | More attractive when costs can be spread across multiple projects | Rental charges accumulate with time |
| Availability | Mats remain available for future projects | Depends on rental inventory and delivery schedules |
| Maintenance | Owner covers cleaning, repairs, and replacement | Responsibilities depend on the rental agreement |
| Storage & Transport | Requires storage and transport between sites | Return transport and collection fees may apply |
| Customization | Greater control over size, color, and connection design | Limited to available rental specifications |
In procurement discussions, the expected number of deployments is more informative than the project duration alone. Contractors who complete multiple short-term projects each year may derive greater benefits from procurement than companies that manage only one long-term project.
Before selecting a rental service, be sure to confirm the minimum rental period, delivery and pickup fees, liability for damage, and cleaning requirements. These costs can significantly alter a quote that initially appears inexpensive.
2. Calculate the break-even point
To make a meaningful comparison, you should first calculate the total cost of each option assuming the same project timeline.
Purchase Cost = Purchase Price of Mats + Transport Costs + Installation Costs + Storage Costs + Maintenance Costs − Residual Value
Rental Cost = Rental Charges + Delivery and Pickup Costs + Installation Costs + Other Contractual Fees
Suppose a project requires 100 ground protection mats to be used over a six-month period:
| Cost Item | Purchase Option | Rental Option |
|---|---|---|
| Mat Purchase or Rental Charges | $12,000 | $2,400/month × 6 = $14,400 |
| Delivery and Collection | $1,000 | $1,400 |
| Installation and Removal | $1,200 | $1,200 |
| Storage, Cleaning, or Maintenance | $600 | $300 |
| Total Cost | $14,800 | $17,300 |
Note: Illustrative calculation in USD for a six-month project requiring 100 mats. Figures are hypothetical, not current market quotations. Taxes, financing costs, residual value, and additional damage charges are excluded.
In this scenario, even without considering future reuse, the purchase cost is still $2,500 cheaper than leasing over a six-month period.
However, if the rental rate, shipping distances, or maintenance costs change, or if the project cycle is shortened, this result will also change. Therefore, actual break-even calculations should be based on the supplier’s quote rather than industry-wide fixed thresholds for leasing versus purchasing.
3. Evaluate Service Life Through Actual Use
There is no fixed service life for ground protection mats that applies to all projects. A mat used occasionally on treated floors may have a much longer service life than those that are subjected to frequent, heavy-duty vehicle traffic, abrasion from sharp debris, or poor floor support conditions over extended periods.
When evaluating whether a ground protection mat is worth purchasing, you should focus on the factors that affect its replacement and maintenance:
• Traffic volume and load: Repeated heavy wheel loads, turning, and localized bending can accelerate wear or damage.
• Storage conditions: Improper stacking, prolonged unsupported storage, and excessive heat can all lead to deformation.
• Condition of the surface and fasteners: Worn treads, enlarged fastener holes, cracked edges, or damaged fasteners may limit the mat’s safe reuse.
• Inspection and maintenance: Cleaning and inspecting the mats after each use helps identify damage before the next project begins.
Rather than blindly believing the unsubstantiated claim that “the service life is fixed at 10 or 15 years,” it’s better for you to ask what condition these mats must be in to continue meeting your intended use.
A useful question to ask when purchasing is: How many projects can these mats actually serve before they need to be repaired or replaced?
4. Compare Cost Per Deployment, not just Cost per mat
For contractors planning multiple projects, the cost per deployment is a clearer indicator of long-term value.
Suppose the ground protection mats from the previous example were purchased for $12,000 and used in eight separate projects.
The initial product cost allocated to each project is:
$12,000 ÷ 8 = $1,500 per deployment
This does not represent the total operating cost. Additional expenses per deployment—such as transportation, labor, cleaning, storage, and replacement—must also be factored in.
This calculation also depends on whether all eight deployments can be completed safely. If the mats fail prematurely, or if future projects require different specifications, the expected savings may not be realized.
When comparing supplier quotes, in addition to the unit price, you should also inquire about the product’s weight, connector prices, availability of replacement parts, packaging details, and warranty terms. If a mat requires additional handling equipment or is difficult to repair, its total cost of ownership may actually be higher, even if the unit price is slightly lower.
4. Make the final procurement decision
At this stage, the decision can be narrowed to the following three practical questions:
1. Will the mats be reused? If future projects have similar load and ground requirements, purchasing them may offer greater long-term value.
2. Can the mats be stored and transported efficiently? When storage space is limited or transport distances are long, the appeal of purchasing them decreases.
3. Are the technical specifications suitable for multiple sites? Reusable mats are only valuable if they remain technically suitable for the next application.
To make an accurate comparison, request a comprehensive quote from the supplier that includes the mats, connectors, packaging, shipping, and any required customization. Compare this quote with a rental quote covering the entire expected project cycle.
After evaluating technical suitability and total cost, the remaining task is to consolidate all selection criteria into a final checklist before placing an order.
Use a Final Ground Protection Mat Selection Checklist
By now, you have evaluated the vehicle load, ground conditions, mat specifications, installation requirements, and project costs. Before placing an order, please carefully consider all these details to ensure that the selected mats are suitable for the actual job site—not just in accordance with the product description.
1. Complete the Pre-Purchase Checklist
Before requesting a final quote or approving a purchase, you can use the following checklist to review key decisions.
Ground Protection Mat Selection Checklist
Review these points before confirming your ground protection mat order.
2. Prepare the information your supplier needs
Checklists are particularly useful when they help establish clear product specifications. Before requesting a quote, please have the following four categories of information ready:
• Application: Type of vehicle or equipment, maximum working load, traffic frequency, and project duration.
• Site Conditions: Foundation type, drainage conditions, slope, weather exposure, and whether the product will be exposed to chemicals.
• Product requirements: Preferred materials, dimensions, thickness, surface patterns, and types and quantities of fasteners.
• Commercial requirements: Delivery location, required delivery date, installation arrangements, and whether the mats will be reused.
You do not need to have all engineering parameters in hand before contacting suppliers. If you cannot provide axle load or ground bearing capacity data, please describe the information you do have and specify what still needs to be verified. Clearly describing the actual operating conditions is more helpful than simply requesting the thickest mats or the highest rated load.
3. Confirm the specification before ordering
You do not need to have all engineering parameters in hand before contacting suppliers. If you cannot provide axle load or ground bearing capacity data, please describe the information you do have and specify what still needs to be verified. Clearly describing the actual operating conditions is more helpful than simply requesting the thickest mats or the highest rated load.
Before approving the final quote, please confirm that the proposed product dimensions, structural thickness, weight, fastener layout, and environmental constraints meet your requirements. Additional engineering verification may be required for heavy equipment, crane outriggers, soft ground foundations, or steep sections.
If site conditions remain uncertain, the ground support and expected loads should be evaluated before continuing construction. Once the suitability of the mat system has been established and a site-approved trial procedure has been developed, a controlled trial installation may be conducted to verify panel displacement, joint stability, and traction under planned operating conditions. The trial installation should not replace an assessment of the foundation’s bearing capacity or product load verification.
The best ground protection mats should meet your project’s load and ground requirements while being easy to install, transport, maintain, and reuse. Clear technical specifications allow for more meaningful comparisons among suppliers and reduce the risk of selecting products based solely on price or thickness.
If you are sourcing mats for an upcoming project, please provide suppliers with details about your vehicles or equipment, ground conditions, required dimensions, and estimated quantities. These details will give suppliers a more reliable basis for recommending suitable products and providing accurate quotes.
Explore our OEM ground protection mat manufacturing options for customized specifications and project requirements.
FAQs
What is the best material for ground protection mats?
HDPE is a practical choice for many temporary access road applications because it strikes a balance between stiffness, impact resistance, moisture resistance, and cost. When wear resistance is a primary consideration, UHMWPE is worth considering; engineering composite mats, on the other hand, are suitable for specialized heavy-duty applications. The selection of the optimal material depends on ground conditions, vehicle loads, and the expected frequency of reuse.
What load rating should I choose?
A mat should be selected based on the actual wheel or track loads, the bearing capacity of the ground, and the expected traffic volume—not solely on the vehicle’s total weight. Verify how the manufacturer’s ratings were determined, including support conditions and test methods. For heavy equipment or crane outriggers, obtain an engineering evaluation report specific to the application rather than relying solely on nominal tonnage ratings.
Are thicker ground protection mats always better?
No. While greater thickness can significantly increase bending stiffness, it also increases weight, transportation costs, and handling difficulty. On soft ground, or when concentrated loads result in greater bending demands, it is reasonable to use a thicker base course; on firm ground, however, a thinner base course may be sufficient for lighter traffic loads. Thickness should be selected based on the load and support conditions, rather than determined solely by the thickness itself.
Which tread pattern works best in mud?
A raised diamond or chevron pattern may help improve traction, but actual performance depends on the tire type, tread geometry, mud consistency, and drainage performance. Deeper grooves may also trap mud, thereby reducing the effective contact area. When driving on muddy roads, you should inspect both the tread and the tire sidewalls and ensure that the tires remain stable during turns and braking.
What mat size is easiest to handle?
Smaller ground protection mats are easier to position by hand and work well in spaces with limited room, but covering the same area requires more mats and results in more seams. Larger mats reduce the number of seams but may require mechanical handling. When selecting a size, you should consider the weight of a single mat, available handling equipment, traffic restrictions, and installation frequency—not just the size itself.
Do I need single-sided or double-sided mats?
When the tire pattern provides sufficient traction and the sole is suitable for the surface conditions, a single-sided anti-slip mat may be the right choice. Double-sided anti-slip mats feature textured surfaces on both sides and, depending on the specific design, may offer more installation options. However, this does not necessarily mean they are more stable, nor does it mean they are suitable for all surfaces. It’s also necessary for you to check the tire pattern, how the sole contacts the surface, and the manufacturer’s recommended installation method.
When is renting mats better than buying them?
For short-term, one-time projects, renting may be more cost-effective, especially if you lack storage space or do not plan to reuse ground protection mats. If the same batch of ground protection mats will be used for multiple projects, purchasing them may be more economical. It’s recommened for you to compare all costs comprehensively, including rental duration, delivery, pickup, installation, storage, maintenance, and replacement costs.
What warranty should ground protection mats include?
Review the provisions in the written terms regarding the warranty period, manufacturing defects, material quality, and the claims filing process. Confirm whether the warranty excludes damage caused by overloading, improper installation, unsuitable foundation conditions, or normal wear and tear. The warranty does not replace load verification; therefore, please verify the product specifications and application limitations separately.
Partner with a Professional Engineering Plastics Manufacturer
We provide stable and reliable engineering plastic sheets and custom processing solutions for your projects
Explore More Blogs


Hey There, I'm Balance!
I am the Supply Chain Manager of YIQI Plastic. With 9 years of experience, including 4 years in engineering plastics, I specialize in material sourcing, quality control, and supply chain management.Feel free to contact us.